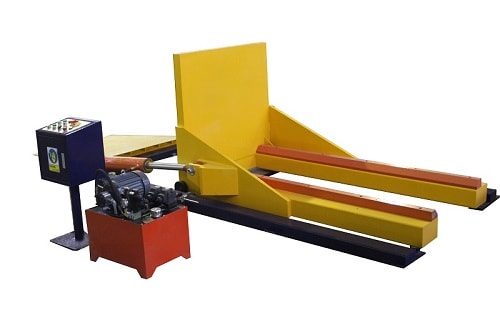
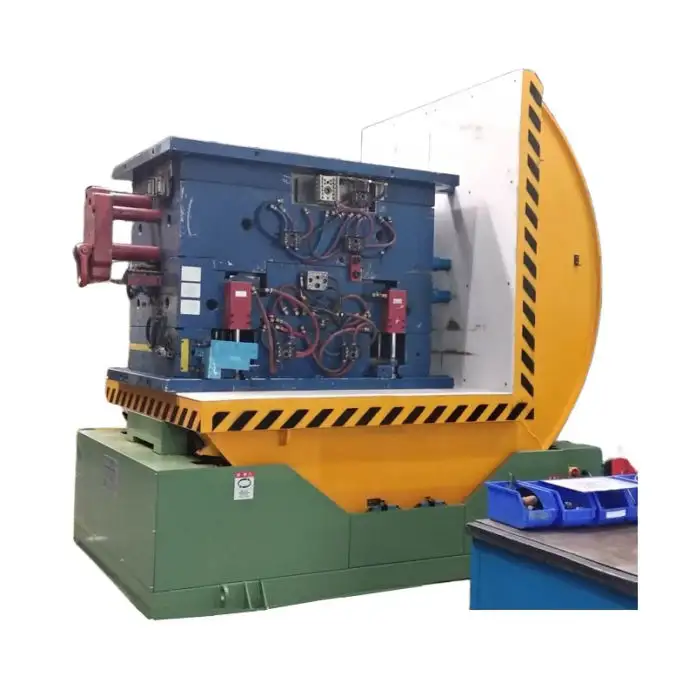
Used Upender & Tilter Marketplace: What to Check Before Purchasing?
You're a factory manager, like my friend Michael in Mexico. You're under pressure. Your production line is humming, but the final packaging and handling of heavy coils or wire rods is a bottleneck. It's slow, risky, and costing you money. You've looked online and found the used equipment marketplace. It seems like a smart way to get a capable upender or tilter without the new machine price tag. But it's a jungle out there. How do you avoid buying someone else's expensive headache? The key is knowing exactly what to inspect before you commit your budget.
Purchasing a used upender or tilter requires a meticulous, multi-point inspection focusing on core mechanical integrity, hydraulic and electrical systems, and the seller's credibility to ensure the machine can handle your specific, demanding industrial workload. A thorough check can mean the difference between a strategic investment that boosts your ROI and a costly piece of scrap metal that halts your production.
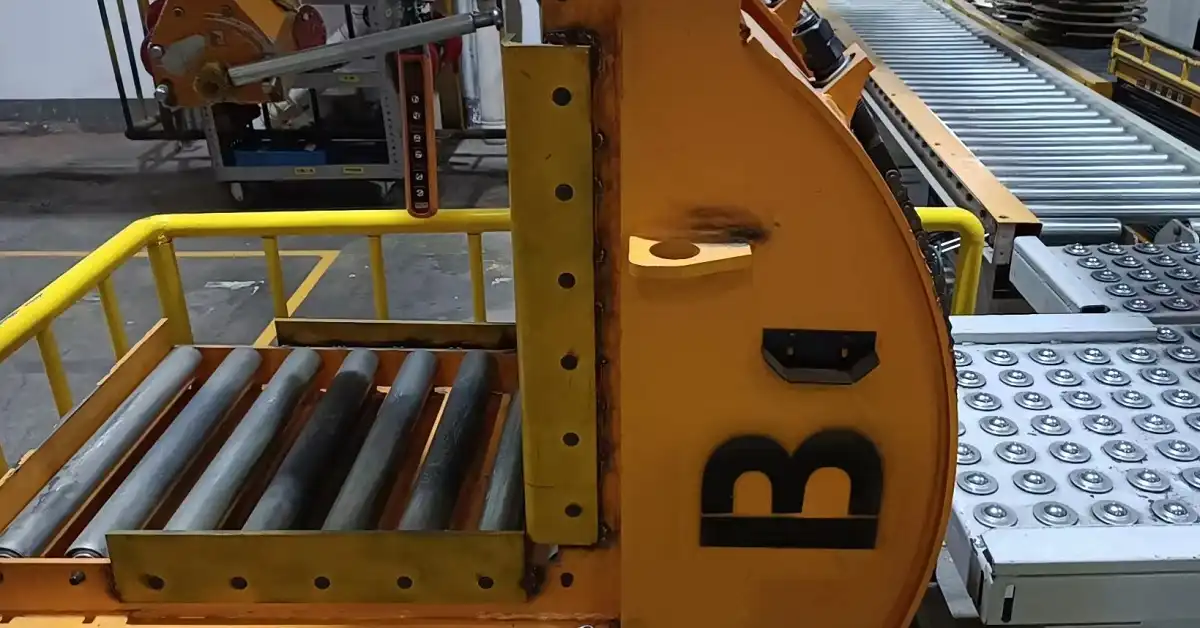
The allure of saving capital is strong, but the risks in the secondary market are real. A failed machine doesn't just stop moving coils; it stops your entire cash flow. Let's move beyond the basic listings and dive into the critical, non-negotiable checks you must perform. This guide will walk you through the essential steps, from the physical inspection to verifying the seller's story, ensuring you make a purchase that supports, not sabotages, your operational goals.
1. What Are the Non-Negotiable Mechanical Checks for a Used Tilter?
You see a used coil tilter for sale. The price looks good. The seller says it runs. But can it handle your 20-ton steel coils, shift after shift? You cannot trust promises. You must verify the machine's bones—its mechanical foundation. A visual check is just the start; you need to look for signs of stress, wear, and potential failure points that could lead to catastrophic downtime or safety incidents.
The non-negotiable mechanical checks involve a hands-on inspection of the main structural frame for cracks or welds, the condition of pivot points and bearings, the wear on gripping arms or forks, and the functionality of all safety interlocks and guarding. Ignoring any of these can result in immediate operational failure or dangerous workplace accidents.

🛠️ The Structural Integrity Deep Dive
The frame is the machine's skeleton. Any compromise here is a deal-breaker.
-
🔍 Inspect Welds and Stress Points: Get a flashlight and look closely at all major weld joints, especially where the lifting arms connect to the main frame and at the base. You are looking for:
- Hairline cracks: These are often signs of metal fatigue.
- Poor-quality weld repairs: Blobby, uneven welds can indicate a past break that was poorly fixed.
- Rust bleeding from seams: This suggests cracks hidden under paint.
-
📏 Check for Frame Alignment and Twist: Ask the seller to run the machine through its full cycle empty. Watch the structure. Does it twist or shudder unnaturally? A misaligned frame means uneven load distribution, which accelerates wear on every other component.
⚙️ The Wear Components Assessment
These parts move and bear the load. Their condition dictates the machine's remaining service life.
| Component | What to Check For | Red Flag / Potential Cost |
|---|---|---|
| Pivot Pins & Bushings | Grab a pry bar (with permission). Check for excessive play or wobble at all pivot points. Listen for clunking sounds during operation. | Worn bushings cause slop, reducing precision and control. Replacing them is a major teardown job. |
| Hydraulic Cylinder Rods | Inspect the chrome rods for pitting, scoring, or deep scratches. Even small defects can shred seals, causing leaks. | A scored rod means immediate cylinder rebuild or replacement—a significant expense. |
| Gripping Pads/Forks | Measure pad thickness. Look for deep grooves, cracks, or uneven wear. Check fork alignment; bent forks cannot lift safely. | Worn pads reduce grip, risking a dropped load. Bent forks are a major safety hazard and often require full replacement. |
| Bearings | Listen for grinding, rumbling, or high-pitched whining noises from gearboxes or wheel hubs. Feel for excessive heat after a short run. | Failed bearings can seize, causing secondary damage to shafts and gears. The repair downtime is lengthy. |
🛡️ The Safety System Verification
A used machine must meet current safety standards. Do not assume it does.
- Physical Guards: Are all rotating parts, pinch points, and hydraulic hoses properly guarded? Missing guards are an immediate OSHA violation.
- Emergency Stops: Test every E-stop button. They must cut all power instantly and require a manual reset.
- Load Limiters & Sensors: If the machine has load cells or tilt limit sensors, ask for documentation or a demonstration to prove they work. A faulty limiter is an invisible danger.
Skipping these mechanical checks is the fastest way to turn a "good deal" into a financial disaster. Your goal is to find a machine whose core structure is sound, even if it needs some component refurbishment. (inspection checklist for used material handling equipment, evaluating wear on industrial tilters, structural integrity of second-hand upenders)
2. How Do You Test the Hydraulic and Electrical Systems?
The mechanical frame might be solid, but the machine's "muscles" and "nerves"—the hydraulic and electrical systems—are what make it work. These are the most common failure points in used equipment. A quick demo is not enough. You need a systematic test under conditions that mimic your real-world use. A leaky valve or a frayed wire can be the source of endless, frustrating downtime.
Testing hydraulic and electrical systems requires checking for leaks, verifying pressure and cycle times, listening for pump cavitation, inspecting wiring integrity, and ensuring all controls and programmable logic controller (PLC) functions operate correctly and consistently. A comprehensive operational test is the only way to uncover hidden issues that a static inspection will miss.

💧 The Hydraulic System Health Check
Hydraulics power the lift and tilt. Their failure means zero productivity.
First, the Visual and Auditory Check:
- Leak Hunt: Don't just look for puddles. Look for wet, oily film around every fitting, valve, hose, and especially the cylinder seals. A slight seep today can be a gusher tomorrow.
- Listen to the Pump: Start the system. The pump should hum steadily. Listen for:
- Whining or Cavitation: Sounds like marbles are in the pump. This means it's sucking air, often due to a low fluid level or a clogged inlet filter. It destroys pumps quickly.
- Knocking or Banging: This indicates serious internal damage.
- Check the Fluid: Ask when the hydraulic oil and filters were last changed. Smell the oil; a burnt smell indicates overheating. Look at its color; it should be amber, not black or milky (which indicates water contamination).
Second, the Performance Under Load Test:
This is critical. You must test with a load as close as possible to your typical coil weight.
- Cycle Time: Time how long it takes to complete a full lift-and-tilt cycle. Compare it to the machine's original specifications (ask for the manual). A slow cycle can indicate a worn pump, internal valve leakage, or cylinder bypass.
- Drift Test: Lift a load to its maximum height and shut off the machine. Observe if the arms or platform slowly sink over 5-10 minutes. Any noticeable drift points to leaking cylinder seals or control valves, a major safety and performance issue.
- Pressure Check: If possible, use a pressure gauge to check the system pressure at the pump outlet and at a cylinder. Low pressure means the machine cannot achieve its rated capacity.
⚡ The Electrical System Diagnostic
Faulty electronics lead to intermittent, hard-to-diagnose problems.
- Wiring Inspection: Open the main electrical panel (with power OFF). Look for:
- Burned or discolored terminals. This indicates past overloads and heat damage.
- Frayed, cracked, or repaired wires. Especially check wires in flexing conduits going to the arms.
- Corrosion. Any white or green powder on terminals is a bad sign.
- Control Function Test: Operate every button, joystick, and switch on the control pendant. Do they all respond crisply? Are any labels worn off? Test both manual and automatic cycles if available.
- PLC & Diagnostics: If the machine has a PLC screen, navigate through the menus. Are there any stored fault codes in the history? This is like checking a car's computer for past engine lights. It can reveal chronic issues the seller may not mention.
A machine that passes these operational tests has a much higher chance of integrating smoothly into your production line. Always insist on testing under load; it reveals truths a no-load test never will. (testing hydraulic power units on used equipment, diagnosing electrical faults in industrial machinery, operational validation for pre-owned tilting machines)
3. Why is the Seller's History More Important Than the Price?
You've found a machine that checks out mechanically and operationally. The price is negotiated. It's tempting to just sign the paperwork. But stop. The final, and perhaps most crucial, factor isn't about the metal—it's about the people selling it. A low price from an unreliable source is the most expensive option. You're not just buying a machine; you're entering a short-term relationship where trust and transparency are everything.
The seller's history is more important than the price because it provides context for the machine's condition, reveals potential hidden issues, and indicates the likelihood of post-sale support. A reputable dealer or factory with verifiable records offers risk mitigation that a cheap, no-questions-asked auction purchase never can. Your goal is to buy confidence, not just equipment.
🕵️♂️ Investigating the Seller's Credibility
You need to become a detective. Ask direct questions and demand evidence.
- Origin Story: Where did this machine come from?
- Ideal: It was a trade-in from a known factory that upgraded. The selling dealer serviced it.
- Questionable: "We bought it at a liquidation auction." This means zero history is available.
- Red Flag: The seller is evasive or gives inconsistent answers about its past.
- Ask for Documentation: A trustworthy seller can provide some, if not all, of the following:
- Service and Maintenance Logs: These are gold. They show what was repaired, when, and how often it was serviced.
- Original Manuals and Schematics: Essential for your own maintenance team.
- Bill of Sale or Previous Ownership Records: Helps establish a clean title and history.
- Check References & Online Presence: Can the seller provide contacts from previous buyers? Do they have a physical business address and a professional website, or just a generic online marketplace profile? Search for the company name along with words like "review" or "complaint."
🤝 The Partnership vs. Transaction Mindset
This is where my own experience building FHOPEPACK comes in. I've been on both sides. When you buy from a true expert partner—like the teams at Fengding or Wuxi Bu Hui—you're buying more than a machine.
- They Understand Your Application: A good seller will ask you detailed questions: "What is your exact coil OD and ID? What's your floor space? How many cycles per hour do you need?" They want to ensure the machine fits your need, not just make a sale.
- They Offer Honest Assessments: A partner might tell you, "This used tilter is good, but for your 24/7 operation, the pump is undersized. We recommend this other unit or a pump upgrade." A transactional seller just says, "It runs. Sold."
- They Provide Post-Sale Support: Will they help with loading and shipping? Can they supply spare parts or recommend a local technician? A partner has a reputation to uphold and will offer some level of support to ensure your success.
A low price from an unknown seller often means you are 100% on your own the moment the machine leaves their lot. Paying a fair price to a reputable dealer includes a premium for risk reduction, historical data, and peace of mind. In heavy industry, that is never a bad investment. (evaluating used machinery dealers, importance of equipment service history, buying from industrial equipment partners)
4. What is the Final On-Site Verification Protocol Before Payment?
All checks are done, the seller seems credible, and you're ready to buy. But there is one final, critical step: the pre-shipment or pre-payment verification. This is your last chance to catch any discrepancies between what was promised and what is being delivered. Never release final payment based on old photos or videos. You or a trusted representative must see the exact, serial-numbered machine in its current state.
The final on-site verification protocol is a methodical, point-by-point reconciliation where you physically inspect the agreed-upon machine, match its serial number, verify all included accessories, and perform a final operational test to confirm nothing has changed or degraded since your initial evaluation. This step solidifies the deal and prevents costly misunderstandings.
📋 The Pre-Visit Checklist
Before you or your agent goes on-site, be prepared.
- Bring Your Notes: Have your initial inspection checklist, noted serial numbers, and photos from earlier viewings.
- Bring a Toolkit: A basic kit with a flashlight, calipers, a multimeter, and a camera.
- Define Acceptance Criteria: Clearly list what constitutes a "pass" for final payment. Share this with the seller beforehand if possible.
✅ The On-Site Reconciliation Process
Follow this sequence methodically.
Step 1: Identity Confirmation.
- Locate the machine's main identification plate. Photograph it.
- Cross-reference the Model Number and Serial Number with the sales agreement and your earlier photos. They must match exactly. This ensures you are getting the specific machine you inspected.
Step 2: "As-Is" Condition Verification.
- Walk around the machine with your original inspection photos.
- Verify there is no new damage incurred during storage or preparation for shipment (e.g., new dents, broken gauges, cut hoses).
- Check fluid levels (hydraulic oil) one more time.
Step 3: Accessory and Documentation Handoff.
- Physically check that all promised items are present:
- Spare parts kit (filters, seals).
- Special lifting forks or adapters.
- The correct control pendant.
- All documentation: Manuals, wiring diagrams, PLC backup files, service logs.
- Create a signed packing list that itemizes everything being shipped.
Step 4: The Final Operational Sign-Off Test.
- Start the machine. It should start without issue.
- Run it through 2-3 complete cycles. It should perform identically to your previous test.
- If any function fails or behaves differently, do not approve payment. Address it immediately.
Do not let excitement or pressure rush you through this final gate. A disciplined verification protocol is your ultimate shield against post-purchase disputes and ensures the asset you paid for is the asset you receive. It turns a handshake deal into a professional, documented transaction. (final inspection before buying used machinery, pre-shipment verification protocol, on-site acceptance testing for industrial equipment)
Conclusion
Purchasing a used upender or tilter demands a disciplined, detail-oriented approach that prioritizes mechanical soundness, system functionality, seller integrity, and final verification over upfront price alone. By following this structured process, you transform a risky buy into a strategic investment that enhances your line's efficiency and safety. For a reliable solution, consider exploring a robust Coil Upender designed for enduring performance.